A short & simple Composer tutorial

In this little Composer tutorial we’ll walk through the absolute basics of Composer, the PHP dependency management tool. Composer has changed the way PHP applications are built, and you should definitly take some minutes to get into this handy little thing.
What does Composer do ?
In the PHP world (and nearly every other language too) there are solutions for most common tasks, most of them available for free as open-source projects. So if you want to create professional HTML mails with PHP, you’ll probably not write everything by yourself from scratch, you’ll search for a mail library, in this case obviously PHPMailer, and put it into your project. And here Composer comes in: Instead of downloading the chart library by hand, moving it by hand into a manually selected folder, including it by hand and maybe messing around with autoloading issues, Composer organizes this, and everything Composer needs is ONE line of code, something like this:
"phpmailer/phpmailer": "5.2.*"
This simple line will add the latest version of the 5.2.x-branch of PHPMailer to your project – in the most cleanest and updateable (!) way possible. Composer will also check if your current server setup fits the minimum requirements of PHPMailer 5.2.x, so let’s say this version needs PHP 5.4 but you have PHP 5.3, then Composer will give out a big fat warning. Composer will also automatically download all necessary dependencies of the specific library. You’ll be able to use PHPMailer everywhere in your project, without further including issues. When you see a new version of PHPMailer comes out, you can update everything without breaking anything with just a simple action on the linux (or windows) command line.
A real example
To install Composer (on Ubuntu, Debian, CentOS, etc. or Windows 7/8) follow this tutorial.
Once Composer is installed, move into your web root and create a new project folder (to keep things clean and not mess into other projects), something like:
/var/www/myproject/
Create and empy file in the myproject folder, called composer.json:
/var/www/myproject/composer.json
Edit the composer.json, put this into the file and save it:
{
    "require": {
        "raveren/kint": "0.9"
    }
}
Note the syntax! As the file extension says, it’s a simple JSON file. This file contains structured data that say Composer what to do. In this very simple example we simply want to include the wonderful KINT tool into your (empty) project. KINT is the massivly improved version of var_dump() or print(). Now make sure you are in your project’s folder (var/www/myproject for example) and tell composer to download the stuff we just declared in the composer.json by doing:
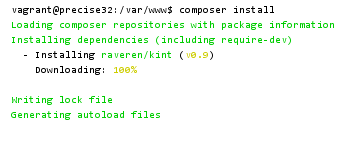
composer install
The result will look like:
Note that Composer has created a folder named vendor in your project and downloaded KINT (and other stuff) into it! Don’t touch this folder, Composer handles everything. Let’s create an index.php in the project’s root, open it and put this in the file (and save):
<?php

require 'vendor/autoload.php';
This loads the Composer autoloader. So this line includes everything that Composer has downloaded into the project.
Let’s have a look onto the KINT GitHub page to get an idea on how to use KINT: The tools offers a very short and really cool debugging function d() ! So with the above require line in our index.php we can use stuff loaded by Composer directly, like – in this case –
d($any_variable);
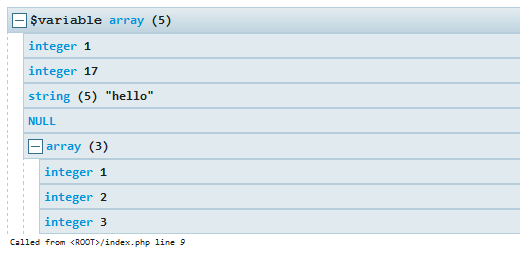
I like! Okay, let’s try this out in our mini example. Create a demo data array and then echo it out via KINT, like this (we are still in the same index.php):
<?php
// load Composer
require 'vendor/autoload.php';

// create demo data
$variable = array(1, 17, "hello", null, array(1, 2, 3));

// use KINT directly (which has been loaded automatically via Composer)
d($variable);
Open this file with a browser now. The result should look like:
This looks and behaves so much better than var_dump()! So what have we just done ? We have included a full external php tool with one line of code in the composer.json (and with a one-line-autoloader in the index.php). The external tool is instantly ready to use. We have included KINT in a very clean and commonly accepted way.
To add another external “dependency” simply add another line into the composer.json (keep the JSON syntax in mind, especially the comma in the end of the lines!):
{
    "require": {
        "raveren/kint": "0.9",
        "phpmailer/phpmailer": "5.2.*"
    }
}
This will add PHPMailer in the latest version of the 5.2 branch to the project. To get this, run
composer update
from the folder where your composer.json is. Usually when working with Composer we do a “composer update” or a “composer install”, depending on the situation. To get an idea what’s the difference between these two, have a look into The difference between “composer install” and “composer update”.


